Today we’re going to discuss developing your dog’s confidence and control with their mouth, and we’ll be looking at the two things you need to keep your dog safe (and keep all your fingers): Leave It and Take It. Now, let’s go over these concepts so you know how we’re working here.
TAKE IT + LEAVE IT DEFINED
Take It teaches your dog to take things gently from your hands. For puppies, this is the cornerstone of developing a soft mouth and learning bite inhibition. For older dogs, we can’t teach bite inhibition anymore, but we can still teach them to take things more gently and to wait for us to approve and release things that go into their mouths.
The Leave It command is a potentially life-saving thing for dogs to learn. The goal is for your dog to learn that things they want are not guaranteed. If you drop food on the floor, most dogs will torpedo after it. As the saying goes: the five-second rule is no good if you have a two-second dog!
Not only is it rude and annoying, but it’s also potentially dangerous. What if you dropped harmful things like a grape or a piece of chocolate? Or if you’re in the bathroom and you dropped a pill? Your dog is going to dive for all of that stuff, so we’ve got to start teaching them that things that hit the floor are not theirs. More than that, dogs also need to learn that anything they want in the world isn’t necessarily theirs to stick their nose into, like McDonald’s wrappers or roadkill, or squirrels and chipmunks, or even other dogs.
Teaching your puppy “Leave It” and “Take it” together will help prevent her from guarding food and toys.
Now for the purpose of this post, we’re going to be using mainly food as the focus. Toward the end, I’ll give you some tips for helping expand this concept to toys, games, and even tasks like fetch and retrieve. There are many moving parts to get really good at what I call the Holy Trinity of Mouth Control: Take It, Leave It, and Drop It. I don’t want this to turn into a half-hour-long, ultra-technical video, so for right now, I’m gonna blaze through Leave It and Take It and give you some practical exercises you can start with TODAY. Let’s get started!
PHASE ONE: TAKE IT
First, we start teaching the dog to take things gently from us. We cannot have them snapping for things like a crocodile. So, we’ll measure out some food during mealtime and hand-feed them. Yup. You heard me right. Take a piece of kibble, say, “Take It, ” and give it to them. After several repetitions, hearing the verbal phrase “Take It” becomes a reliable predictor of receiving something from your hand. However, the caveat is that it’s got to be done politely. So if they become over-exuberant in taking the food, we give them feedback and take the food away. Use your wrist like a pivot, and flick it away.
One thing I see people doing a lot is giving an instructive reprimand like “Gentle” or “Easy.” This isn’t necessarily wrong. But if you use it too much, which is what many people do, then you’re implying that they only have to take it gently or easily when you say it. The expectation needs to be universal; every time, everywhere.
A more productive kind of feedback is just a simple “Nope.” This signals that they need to keep trying. Of course, effective feedback includes both sides of the coin, so make sure to praise them when they do take it gently. The food itself is a reinforcer, but we need that voice to be a big part of it because once we get into Leave It, they may not get the food. So praise for a job well done lays the foundation for good behavior down the road.
Also, watch the head angle. If they’re looking up at it there’s a greater tendency to jump and snap. Lower the food, so it’s coming straight in or even a little below. Also, use your palm for a dog with a big mouth; otherwise, your fingers will disappear inside! This phase goes really quickly. For puppies, I always teach my students to hand feed for the first few weeks, and this is SUCH A POWERFUL AND EASY TO DO. Even for older dogs, a day or so of this should drastically change how they take food from you.
PHASE TWO: LEAVE IT + TAKE IT
We start this process pretty simply. You don’t necessarily even need to wait to start this. Present a tasty treat in your open palm and say one time, “Leave it.” They’re going to for it, and when they do, close your hand and say, “Nope.” And then WAIT. You don’t need to repeat yourself, and don’t move your hand no matter how much they fuss at it or how long it takes. WAIT IT OUT.  The instant your dog stops actively trying to get the foof—and they will—immediately say, “Yes! Take it,” and hand them the treat. Timing is critical here. Don’t pussyfoot around. Praise and reward immediately.
As you practice, your dog will start responding faster and faster. You’ll also see them starting to get comfortable while they wait. These “bargain-basement stays” are exactly what you’re waiting for so reinforce the heck out of these. 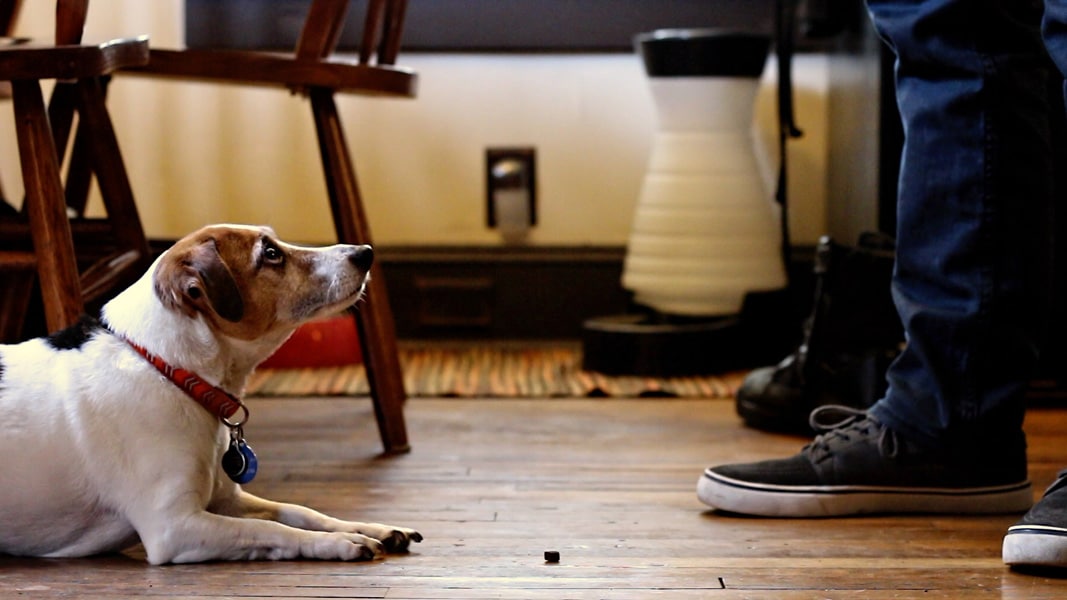
Build Duration
Then start hanging out. Get 3 seconds before you let them have it, then 5, and ultimately 10 before you let them Take It. Count these out as you wait. Remember, feedback is part of learning. You’re marking the behavior and letting them know that’s what you want. This is important.
See also: How to Use Marker Training.
Diversify: Non-Food Decoys
As soon as you feel comfortable, start diversifying the types of things that you practice Leave It with. Using some of your dog’s favorite interactive toys is a really good way to do this, and it’s a fantastic gateway to proofing this behavior and teaching Drop It. Tug and fetch (retrieve) are great teaching games for these. Check out my video on the 4 Types of Toys for more info.
Also practice with paper products! Dogs tend to find a tissue, toilet paper, toilet paper rolls, and crumpled-up paper absolutely fascinating. Make sure they understand the rules apply to everything in the universe. The only difference here is that you’ll reward them with food or a toy instead of a paper product.
See also: How to Use Reward Scaling.
PHASE THREE: SUPERCHARGE LEAVE IT + TAKE IT
Now you’re ready to raise the criteria, which is how we get better. The previous steps are standard obedience class fare, but we aren’t gonna stop there. We’re gonna go to the extreme. So, now we repeat the Leave It and Take It exercises by placing the item on the ground. Use your hand to cover it if necessary. I don’t recommend letting the dog slurp food off the ground, though. I don’t want them to get used to doing that, so when you use food as the lure, pick it up or have a second one in your hand ready to give them.
Don’t forget to use “Take It.” Then get to where you’re standing up and covering it with your foot or body blocking, if necessary. As before, we want bargain-basement stays without having to cover the item. You may even see your dog back up, too! Give good feedback for eye contact; give good feedback for showing self-restraint.
Then, we’re going to drop it from a few inches. Next, drop it from waist height. Finally, we’re going to toss it short distances. Boy, this is usually where they crack. Keep at it! Give feedback for good performance and feedback for poor performance, and challenge yourselves. Finally, get to where you can actually toss the item in their direction without them taking it.
PHASE FOUR: TAKE IT OUTSIDE
When Leave It and Take It are well understood, you should have things pretty well on Voice Control, meaning that if you say “Leave It” your dog will stop moving towards something and wait for your next direction. Now it’s time to raise the criteria and challenge yourselves again.
First off we need to do the exercise in as many places as possible. As I’ve mentioned before, dogs don’t generalize very well. If you train your dog in the kitchen, you’ll have a great kitchen dog. So we always practice things in as many places as we can so they learn it means the same thing everywhere.
On a walk, we want them to leave things alone when we tell them. The best way to practice is to do a set up.
- Have something set up that the dog wants, like a bowl of food or a pile of treats, or their favorite ball.
- Then do some flybys. Walk by, and pay attention to the signals you feel in the leash.
- Point at the item, say “Leave It,” and see what happens.
- If your dog keeps trucking and pays attention to you, GREAT. Praise, and reward with a treat from your pocket.
- If they strain to get the item, we go back to exactly how we practiced in the beginning: WAIT IT OUT. When they give up, praise and reward just like before.
Then, flyby again. Every re-exposure makes it easier for them to listen because the item is less exciting each time. That means more opportunities for you to reinforce what you want.
Here’s a pro tip: always face the direction you want to go. Turning around validates the item they want. Facing away keeps your energy moving in that direction. When it’s clear that your dog is listening, you’re ready to hit the gas and reward them in motion while walking away. Couple this with all of your other walking tools like getting and keeping their attention, good voice control, off-leash following, and solid heeling when necessary, and you’ve got a Swiss-army knife of a tool in your back pocket.
MORE PRO TIPS
So there are a lot of moving parts to this whole thing. Here is a list of some more pro tips to help you excel:
- Try your best not to let there be mistakes. If your dog gets the food or toy from you, that’s self-reinforcing and will encourage them to keep trying…because sometimes it works! You must do your best to make it as error-free as possible.
- If you’re working with your new puppy, help them develop a strong chew toy habit. If your puppy always wants to play with chew toys, she won’t seek out inappropriate objects that need to be taken away. Additionally, teach your pup to give up her chew toys when you ask voluntarily.
- For older dogs, don’t let them scavenge around. Dogs are opportunistic scavengers; if snooping around yields rewards, it’s self-reinforcing. So keep them focused on YOU, and reward them lavishly when they do as you ask.
- Start using toys and games immediately as part of your Take It and Leave It training. Tug, for example, is an awesomely productive game for teaching manners and restraint.
- In this vein, you should also start incorporating Drop It into your repertoire. Leave It is for things your dog wants; Drop It is for something they already have, so make sure that’s part of your practice.
- Take It and Drop It are also gateways to great fetches, retrieves and lightning-fast recalls. We’ll take a bigger look at Drop It, in another video.
FINAL THOUGHTS
All right, guys, wow. This was a dense post! Good luck with Leave It and Take It. Don’t let yourself get too discouraged; take your time with it, and rewatch the video if necessary. Stick with it, and you’ll create some really good habits, which, as they say, are as hard to break as bad ones.
If you get into a pickle, contact a certified professional dog trainer to help you sew it up!
So here’s my question: what other things you’d like to see videos about? What are you struggling with? What’s making your blood boil? Let’s connect in the comments below.
Don’t forget to thumbs up this video, and as always, keep learning, keep practicing, and we’ll see you next time. Thanks for watching!
RESOURCES
Look at our vlog post on the Four Types of Toys and How To Use Them for more tips on mouth control.
When working with multiple dogs, differentiate your prompts by their names. You can teach a new dog their name, and then make sure you’re using best practices!
Check out the video from Dog Star Daily (Dr. Ian Dunbar) about Take It and Leave It (although he calls Leave It “Off”)
The Covered Rally Bowl used in the outdoor practice. A covered bowl is a good tool because it prevents the dog from accidentally getting the food. As I said in the video, errors will set you back and erode your reliability. A cover helps you make it error-free.


Great blog I ever read
Overall, the blog post appears to be well researched and provides clear, actionable advice for dog owners who want to teach their dogs these important commands. The use of positive reinforcement techniques is in line with current best practices in dog training and the writer’s approach is likely to be effective for many dogs and their owners.
I am grateful that this post underlined that when we are working with new puppies, it is encouraged that we help them develop a chew toy habit. In doing so, it helps them learn their jaw strength and control them too. Since I am planning to have my puppies trained, I will definitely remember to start with chewing.
My sister wants to have her dog trained because the said pet will be our pet guard. Training a pet will be difficult considering the possible distractions that it may encounter, which is why I agree with you that it will be wiser to provide reinforcement. Aside from this, you made a pretty good point that “drop it” must be included in its daily routine as well.
This is a highly educative article. We hope to make reference to it at our website: http://electedbooks.com
I appreciate what you said about not letting dogs scavenge. I need to train my dog to stop picking up trash with his mouth. I’ll have to hire a trainer to help me out.
Great post! We will be linking to this great article on our website. Keep up the good writing.
http://businesshint.eu
I have just found your site. Thank you so much for helping me understand my dog better. I have been struggling with puppy behaviour, he is also a rescue dog who is nervous and pulls when I walk him. I am finding your videos very helpful.
Great! Happy to help!